


In the last part, we added some images to our blog page. In this part, we are going to add hyperlinks and navigation to our pages.
In the root of the project, create a file called contact-us.html:

For now, lets add the following html code to the page:
<!DOCTYPE html>
<html lang="en">
  <head>
    <meta charset="UTF-8">
    <meta name="viewport" content="width=device-width, initial-scale=1.0">
    <title>Contact Us</title>
  </head>
  <body>
      <h1>Contact Us</h1>
  </body>
</html>
Save the file and view the result in the browser.

The Anchor Element
We want to add a hyperlink from our home page (index.html file in the root folder) to the contact-us.html page that we just created. We can create a hyperlink using the <a> tag which represents the Anchor element.
Linking to a HTML Page in the Same Folder
Open the index.html file in the root folder. Add the anchor element Before the <h1> tag:
<a>Contact Us</a>
The text "Contact Us" inside the anchor element is the clickable hyperlink text. But similar to the image element, we need a way to tell the anchor element where do we want to go when we click on the text. For that, we need to use the href attribute which is used to define the destination for the link.
<a href="contact-us.html">Contact Us</a>
Because our destination file (contact-us.html) is located in the same directory as our page which we are calling it from (index.html), we only need to write the file name with its extension (href="contact-us.html").
Save the file and view the result:

You can click the link and that will take us to the new contact-us.html page.
Linking to a HTML Page in a Subfolder
Let's add another anchor element to take us to the blog page. Add a new <a> tag before the anchor element that we added for the contact-us.html page. The blog page is located inside the blog/ folder and the name of the file is index.html. We need to set the href attribute value to blog/index.html.
<a href="blog/index.html">Blog</a>
Save the file and check the result:
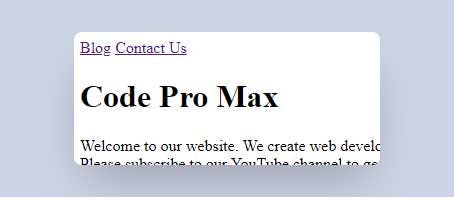
Click the "Blog" link and that should take us to the blog page.
Linking to a HTML Page in Parent Folder
Right now, on the home page (index.html) we can use the "Blog" link to go to the blog page (blog/index.html). But we don't have a link on the blog page to get us back to the home page.
Inside the blog/index.html page add an <a> tag. The home page is in the parent directory. For the href attribute to go back a folder, we need to add ../ and then write our file name index.html. I will also set the text inside the <a> tag to "Home".
<a href="../index.html">Home</a>
Save the file and check the result:

Click the "Home" link and that should take us back to blog page.
So the ../ means that at first, navigate back one level to a higher parent directory. If we want to navigate back twice, we can do that by adding another ../ at the beginning of the path (../../filename.html).
There is another way to define a url path relative from the root folder meaning that it will start from the root path (mySite folder) no matter how many folders deep our HTML file is located. To do that we need to place a / before our path.
Change the href attribute value for the home page to /index.html.
<a href="/index.html">Home</a>
Save the file and check the result. You notice that the result is the same as before.
Linking to a HTML Page on the Internet
We can link to a page from the internet by placing its url path as the href value.
Inside the index.html page, insert an <a> tag and set its href attribute to https://google.com.
<a href="https://google.com">Google</a>
Save the file and check the result:

Click the "Google" link and that should take us to Google website.
Open HTML Link in a New Tab/Window
If we click the "Google" link, it will make us leave our page and go to Google website. But it would be better if we open the link in a new window or in a new tab if the browser supports that. We can do that by adding the target attribute and set its value to _blank.
<a href="https://google.com" target="_blank">Google</a>
Save the file and check the result. You notice that the result is the same as before but now when you click the "Google" link, it will open it in a new tab.
Add links to all other pages
Our home page (index.html) has the links to all other pages. Let's add the same links to the blog page and the "contact us" page.
Inside the blog/index.html page we already have a link to the home page and we just need to add a link to the "contact us" page:
<a href="/contact-us.html">Contact Us</a>
Inside the contact-us.html page we need to add links to the home page and the blog page:
<a href="/index.html">Home</a>
<a href="/blog/index.html">Blog</a>
Save all the files and check the result. We now have full navigation to all the pages we have created.
Code Formatting
Before we end this episode I want you to pay attention to the formatting of the code. Notice that we can write the HTML code however we want and have multiple empty spaces between the lines.
<!DOCTYPE html><html lang="en">
<head>            <meta charset="UTF-8">         <meta name="viewport" content="width=device-width, initial-scale=1.0">

  <title>


  Contact Us</title>
</head>
<body><a href="/index.html">Home</a>
<a href="/blog/index.html">


Blog</a><h1>Contact Us</h1></body>
</html>
If we save the file and check the result, nothing has been changed. But our code now looks ugly and hard to read. This is very important specially if you work at a company where multiple developers interact with the same code-base as they will also have problem reading your code.
A common practice is to indent the code when it's needed. We usually indent the child elements so that the code is easy to read. There are other code formatting practices that you can apply but again this all depends on the coding style that you or your team will be using.